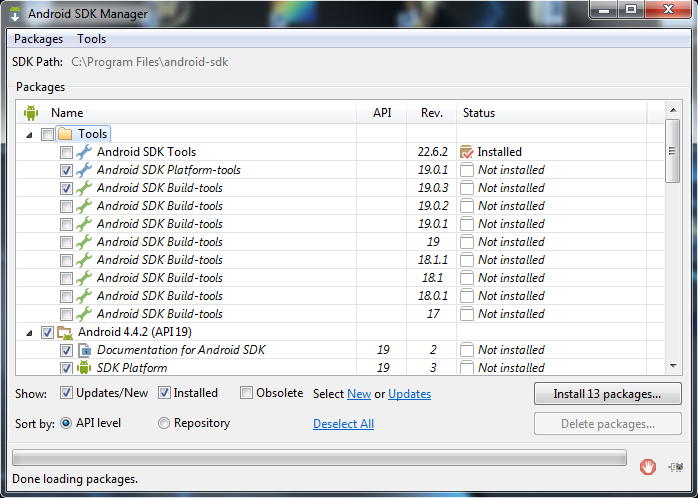
jMonkeyEngine supports android deployment, and it’s fully integrated in the SDK. The android support is in constant enhancement so if you have questions or suggestions, please leave a comment on the Android forum thread!
Mobile deployment is a “one-click” option next to Desktop/WebStart/Applet deployment in the jMonkeyEngine SDK.
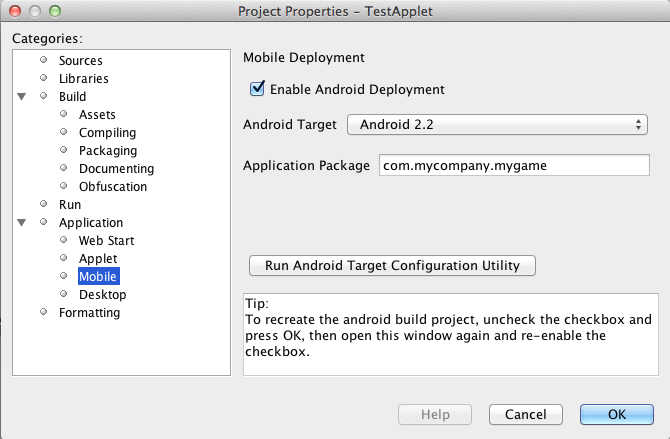
The Android deployment option creates a separate sub-project for android and makes the main project and associated libraries available to the sub-project as libraries. The sub-project can be edited using NBAndroid (see below) or using Eclipse or any other IDE that supports standard android projects. Normally you do not need to edit the android project files. Exceptions are described further below. The libraries are first added to the android sub-project when the main project is built for the first time.
Open your game project in the jMonkeyEngine SDK.
Building
Right-click the project node to build your project.
An APK file is created in the “dist” folder.
Running
The default android run target uses the default device set in the Android configuration utility. If you set that to a phone you can run the application directly on your phone, the emulator does not support OpenGLES 2.0 and cannot run the engine.
When running your application on some Android devices, having a debugging session open via certain IDEs will significantly lower performance (some reports suggest a drop from 60 FPS to 4-8 FPS) until the debug session is detached or the application is started directly from the device.
During build, the libraries and main jar file from the main project are copied to the android project libs folder for access. During this operation the desktop-specific libraries are replaced with android specific JARs.
Be aware that logging has been identified as having a significant performance hit in Android applications. If getting poor performance please try turning logging either down or off and retesting.
Activating the nbandroid plugin in the jMonkeyEngine SDK is optional, but recommended. You do not need the nbandroid plugin for Android support to work, however nbandroid will not interfere and will in fact allow you to edit the android source files and project more conveniently. To be able to edit, extend and code android-specific code in Android projects, install NBAndroid from the update center:
If the android plugin is not in that list follow these instructions.
You can use the jMonkeyEngine SDK to save (theoretically) any jMonkeyEngine app as Android app. But the application has to be prepared for the fact that Android devices have a smaller screen resolution, touchscreens instead of mouse buttons, and (typically) no keyboards.
Best Practice: Ideally, you write the core application code in a way that it checks for the environment it’s being run on, and automatically adapts the device’s limitations by switching off effects, changing input mechanisms etc. Learn how to read graphic card capabilities here.
As described above, you should always try to design your application as platform independent as possible. If your game becomes a sudden hit on android, why not release it on Facebook as an applet as well? When your application is designed in a platform independent way, you don’t have to do much more but check a checkbox to deploy your application as an applet. But what if you want to for example access the camera of an android device? Inevitably you will have to use android specific api to access the camera.
Since the main project is not configured to access the android api directly, you have to install NBAndroid (see above) to be able to edit the created android project in the SDK. After installing, click the “open” project button and navigate to the “mobile” folder inside the main project folder (it should show up with an android “a” icon) and open it.
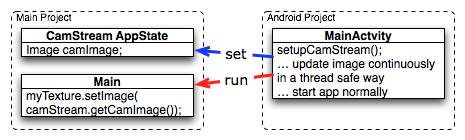
Although you will use android specific api, using a camera is not exactly android specific and so you should try to design this part of the application as platform independent as possible as well. As an example, if you want to use the phones camera as an image input stream for a texture, you can create e.g. the AppState that manages the image and makes it available to the application inside the main project (no android code is needed). Then in the android part of the code you make a connection to the camera and update the image in the AppState. This also allows you to easily support cameras on other platforms in the same way or fallback to something else in case the platform doesn’t support a camera.
Note that you have to build the whole project once to make (new) classes in the main project available to the android part.
When you have a mobile project in the “important files” section you have an “Android Properties” file.
There are 2 entries in this file :
key.store=path/to/your/keystore/on/your/drive/mykeystore.keystore
key.alias=mykeystorealias
If those entries are filled, the apk will be signed during the build.
You’ll be prompted when building to enter the password (twice). It will generate a signed apk in the dist folder of your project.
There is currently no proper guidance of running on android. The SDK will later provide tools to adapt the materials and other graphics settings of the Android deployment version automatically.
Copyright 2020 jMonkeyEngine Wiki Contributors. Licensed BSD-3.